Posts

And now for something completely different...

Image
I recently hosted a party and received many gifts. In response I decided to send out thank you cards. Of course, I can't do anything the easy way. So, I took some inspiration from Japanese wood block printing and started working on this. Obviously, I have some work to do, but for a first print in the completed block set, I find it encouraging.  So here's the process: Laser printer transfer - create your design and print it on a laser printer. Use acrylic medium to glue your image face down to your lino block. Let the medium dry overnight. In the morning dampen the paper and rub it off the block with your fingers or a damp cloth. Linoleum carving - using various chisels remove all the areas which are not supposed to hold ink. First key block test - I had to make sure I did it right. From the full set you can see that the pigments are going down in multiple layers. In hindsight I would cut the ocean as one block and use ...
Solidworks - Easy Resin Print Supports

Image
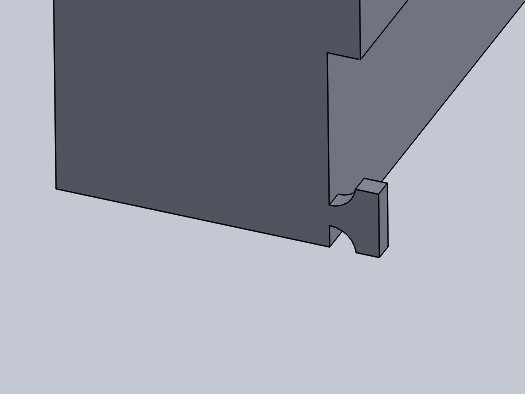
     The biggest issue I have had printing small parts is bed adhesion. LycheeSlicer comes with some powerful automatic tools for building supports, unfortunately they don't know which surfaces are important and they raise the part off the bed surface which ruins one very valuable reference surface.     My solution has been to painstakingly apply custom supports in Solidworks, by mimicking the automatic tools of LycheeSlicer.  But last night I developed a better method. 1) Create a feature which will easily break from your printed part. 2) In a new sketch plane on the build plate side of your part, offset the profile of the part.  Replace all the sharp edges of the offset with radii.  I find the simplest tool for this job is the sketch fillet.  Exit the sketch. 3) Select your support feature and add a curve driven pattern.  Play around with the settings until it looks right, and you should have something like this: 4) Build a raft a...

Come Visit the Aperture Science Center

Image
     I went shooting with my friend the other day, and we played a little game I like to call Precision Poker.  The way this game works is you staple a deck of cards to a target board.  Each shooter takes a turn with 5 shots.  If all 5 shots hit different cards then that is the shooter's dealt hand.  If the shooter misses the target board entirely or hits the same card twice, or hits a card in someone else's hand, those shots are considered automatic discards.  Each shooter has the opportunity to shoot up to 5 more rounds according to the cards he wishes to discard. You may choose the distance at which the game is played.  With a standard size deck, I like to play at 50 yards.        So, long story short, I trounced my friend.  He went first, and I spotted for him.  I picked out a royal flush for him, but he missed.  He missed every card I called.  I felt pretty bad.  And then I shot my royal ...

It's Getting Hot in Here, So Take off all your Cores

Image
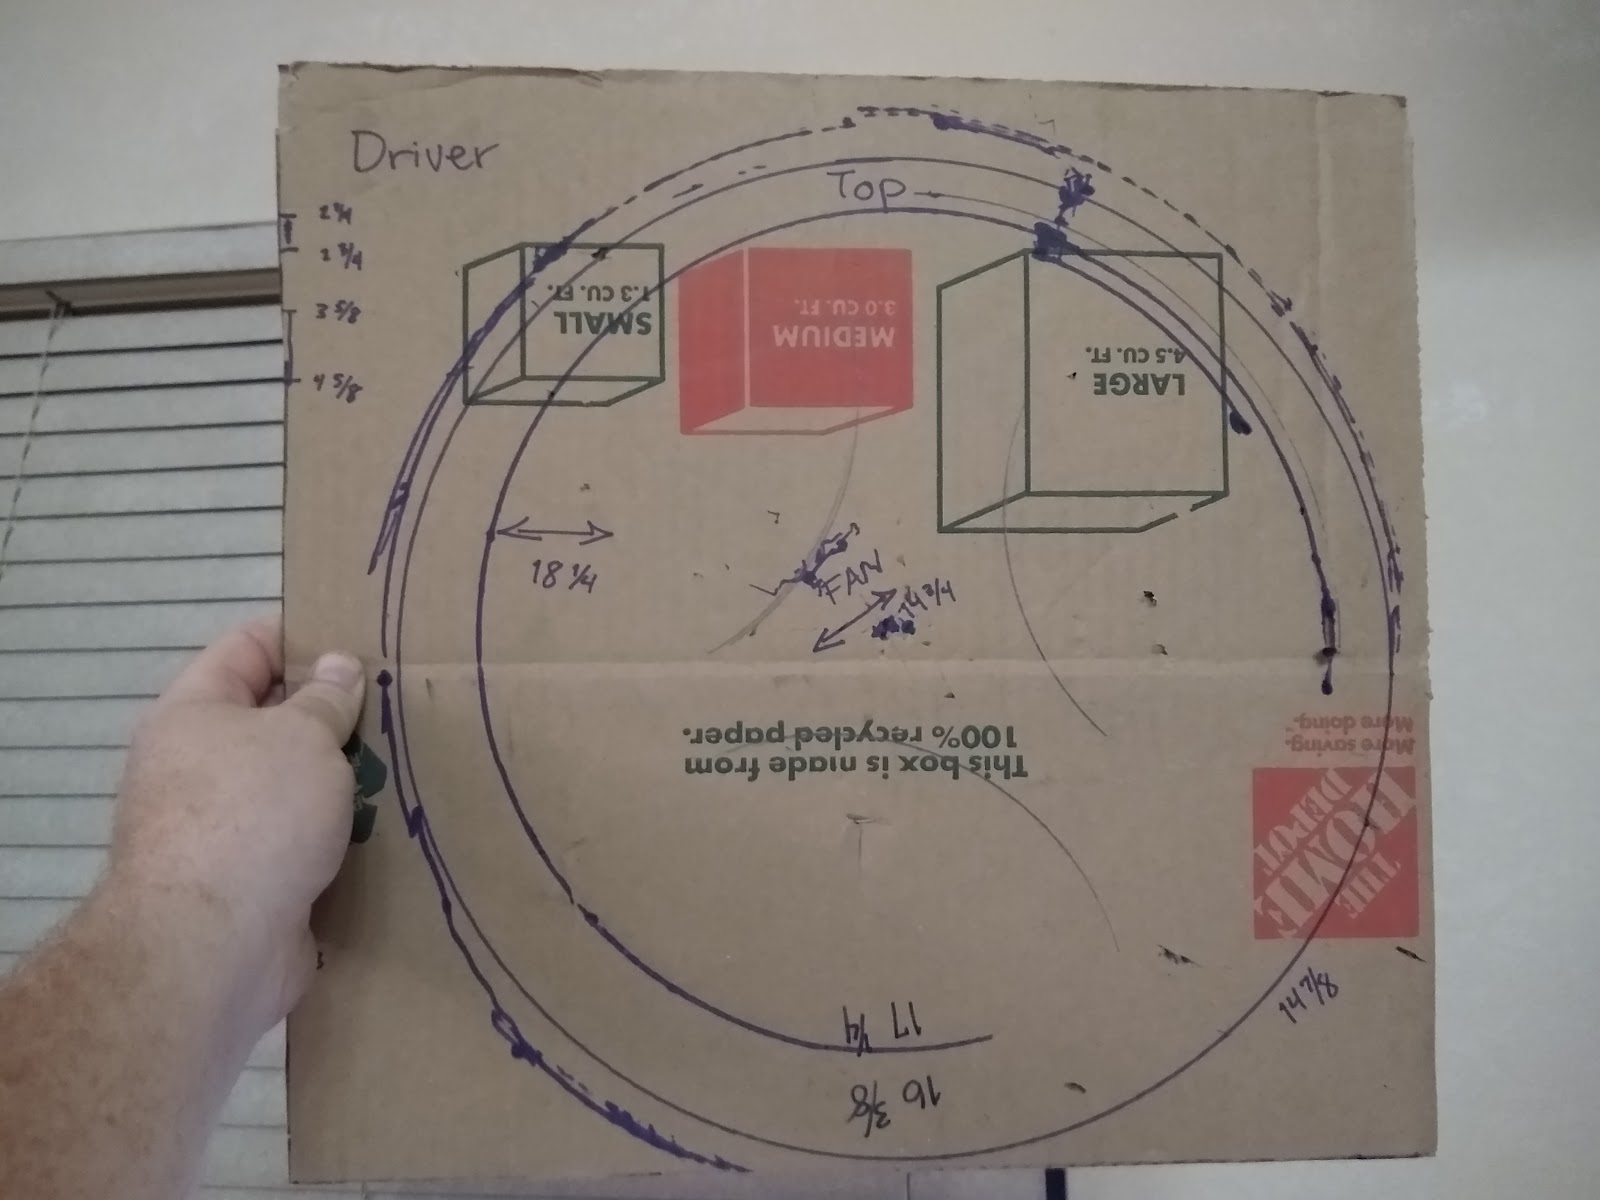
The falcon has always had an overheating problem.  If the ambient temperature is below 80°F then the coolant temperature is fine.  But that doesn't work so well in the summer 'round these parts.  So I did a little CAD, and then I did a little CAD, and then I did a little more CAD, and then I did some FAD. Here are a few scribblings on Cardboard. And then I found a use for that photogrammetry model that I made.  Look ma, no hands! Then I tested the model in 1/4 scale. Then I went to kinkos and printed out a full size pattern which I glued to some Foamboard.   As you can see in the video below, there are no collisions with the the fan shroud model. Then I built a some tabs to bolt the fan shroud to the radiator. Now, all I have to do is wait until I can afford to buy the aluminum and the sheet metal brake, and oh yeah, the bar roller.  :/ Guess I'll just make due with premium gas and after dark drives next summer.  

Row, Row, Row Your Boat

Image
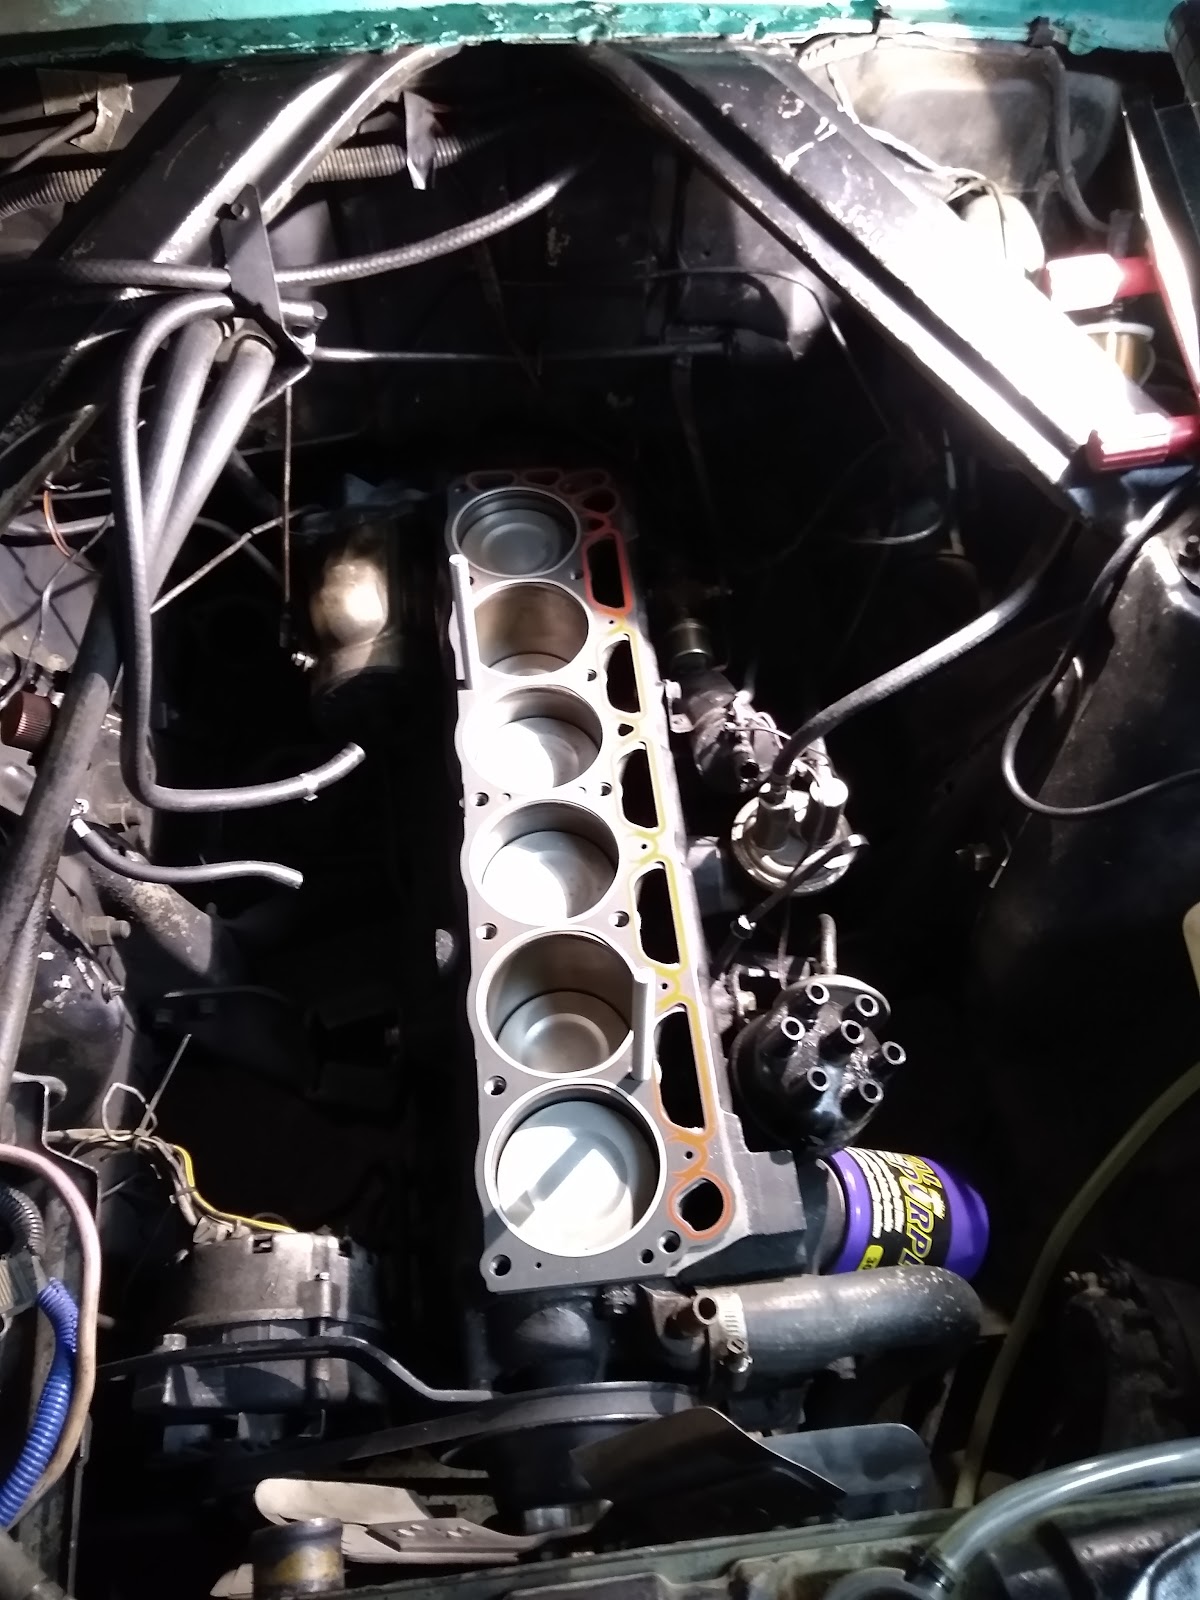
  Small update today.  I got the head back from the machinist a while ago.  And decided I should get some progress on this project.  You can see in the photo below that I cleaned the carbon off the pistons.  I think it turned out pretty well.  I used all-thread to keep the head gasket lined up while I dropped the head in place. And below, the head is torqued in place.  Next is the rockers and lash adjustment.   Merrily, merrily, merrily, merrily ...

Galatea Sleeps

Image
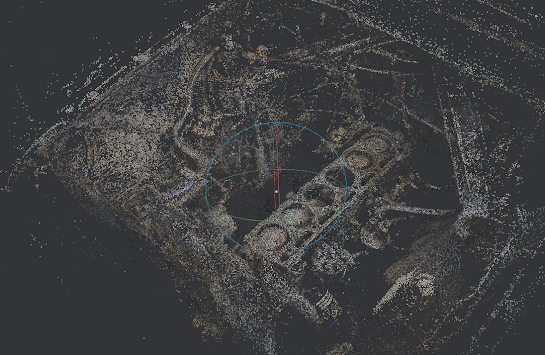
 A render of the Falcon's engine bay.  It looks like a good start to me.  I don't need a really detailed model of the engine bay. I really only need it to give me a rough idea of where not to put exhaust tubes.  This is Meshroom from AliceVision.org.  What a fantastic resource.  Unfortunately, my computer does not have an Nvidia video card with CUDA support.  So, I will be handing these files off to my brother to finish for me.  What a nice guy. Here is one of the photos from the set, used to make this rendering.

The Reason This All Started

Image
 My car, a 1960 Falcon, was burning oil.  I checked my oil for glitter; I replaced my PCV valve; I performed wet and dry compression tests; I performed a leak down test.  All these tests pointed to a strong engine.  The Falcon burned oil.  The only thing left was my valve stem seals. I do not have a compressor big enough to get a valve seal replaced before dropping a valve.  So, I decided to take the head off to replace the valve seals.  I am glad I did. This engine has had many hands in it over the years.  I'm pretty sure the valve seals are a couple decades old.  I have been informed by past mechanics that the valve train parts were incorrect.  Apparently, they never got it right.  My valve stem retainers left a burr on some of the valves.  I also noticed a little play in the first valve guide.  I am not sure what the tolerance on valve guides is, but I do not have the tools to replace a valve guide.  So, I decided ...